LangGraph
透過 LiteLLM 使用 OpenAI chat completions 格式呼叫 LangGraph 代理程式。
| 屬性 | 詳細資訊 |
|---|---|
| 說明 | LangGraph 是一個用於建構具狀態、多角色應用程式的框架,搭配 LLMs。LiteLLM 支援透過串流與非串流端點呼叫 LangGraph 代理程式。 |
| LiteLLM 上的提供者路由 | langgraph/{agent_id} |
| 提供者文件 | LangGraph Platform ↗ |
先決條件: 您需要一個正在執行的 LangGraph 伺服器。請參閱下方的 設定本機 LangGraph 伺服器。
快速開始
模型格式
langgraph/{agent_id}
範例:
langgraph/agent- 呼叫預設代理程式
LiteLLM Python SDK
import litellm

response = litellm.completion(
    model="langgraph/agent",
    messages=[
        {"role": "user", "content": "What is 25 * 4?"}
    ],
    api_base="http://localhost:2024",
)

print(response.choices[0].message.content)
import litellm

response = litellm.completion(
    model="langgraph/agent",
    messages=[
        {"role": "user", "content": "What is the weather in Tokyo?"}
    ],
    api_base="http://localhost:2024",
    stream=True,
)

for chunk in response:
    if chunk.choices[0].delta.content:
        print(chunk.choices[0].delta.content, end="")
LiteLLM Proxy
1. 在 config.yaml 中設定您的模型
- config.yaml
model_list:
  - model_name: langgraph-agent
    litellm_params:
      model: langgraph/agent
      api_base: http://localhost:2024
2. 啟動 LiteLLM Proxy
litellm --config config.yaml
3. 向您的 LangGraph 代理程式發出請求
- Curl
- OpenAI Python SDK
curl http://localhost:4000/v1/chat/completions \
  -H "Content-Type: application/json" \
  -H "Authorization: Bearer $LITELLM_API_KEY" \
  -d '{
    "model": "langgraph-agent",
    "messages": [
      {"role": "user", "content": "What is 25 * 4?"}
    ]
  }'
curl http://localhost:4000/v1/chat/completions \
  -H "Content-Type: application/json" \
  -H "Authorization: Bearer $LITELLM_API_KEY" \
  -d '{
    "model": "langgraph-agent",
    "messages": [
      {"role": "user", "content": "What is the weather in Tokyo?"}
    ],
    "stream": true
  }'
from openai import OpenAI

client = OpenAI(
    base_url="http://localhost:4000",
    api_key="your-litellm-api-key"
)

response = client.chat.completions.create(
    model="langgraph-agent",
    messages=[
        {"role": "user", "content": "What is 25 * 4?"}
    ]
)

print(response.choices[0].message.content)
from openai import OpenAI

client = OpenAI(
    base_url="http://localhost:4000",
    api_key="your-litellm-api-key"
)

stream = client.chat.completions.create(
    model="langgraph-agent",
    messages=[
        {"role": "user", "content": "What is the weather in Tokyo?"}
    ],
    stream=True
)

for chunk in stream:
    if chunk.choices[0].delta.content is not None:
        print(chunk.choices[0].delta.content, end="")
環境變數
| 變數 | 說明 |
|---|---|
LANGGRAPH_API_BASE | 您的 LangGraph 伺服器基礎 URL(預設:http://localhost:2024) |
LANGGRAPH_API_KEY | 用於驗證的可選 API 金鑰 |
支援的參數
| 參數 | 型別 | 說明 |
|---|---|---|
model | string | 格式為 langgraph/{agent_id} 的代理程式 ID |
messages | array | OpenAI 格式的聊天訊息 |
stream | boolean | 啟用串流回應 |
api_base | string | LangGraph 伺服器 URL |
api_key | string | 可選 API 金鑰 |
設定本機 LangGraph 伺服器
在將 LiteLLM 與 LangGraph 搭配使用之前,您需要一個正在執行的 LangGraph 伺服器。
先決條件
- Python 3.11+
- 一個 LLM API 金鑰(OpenAI 或 Google Gemini)
1. 安裝 LangGraph CLI
uv add "langgraph-cli[inmem]"
2. 建立新的 LangGraph 專案
langgraph new my-agent --template new-langgraph-project-python
cd my-agent
3. 安裝相依套件
uv add -e .
4. 設定您的 API 金鑰
echo "OPENAI_API_KEY=your_key_here" > .env
5. 啟動伺服器
langgraph dev
伺服器將會在 http://localhost:2024 啟動。
驗證伺服器正在執行
curl -s --request POST \
  --url "http://localhost:2024/runs/wait" \
  --header 'Content-Type: application/json' \
  --data '{
    "assistant_id": "agent",
    "input": {
      "messages": [{"role": "human", "content": "Hello!"}]
    }
  }'
LiteLLM A2A Gateway
您可以在 LiteLLM 的 A2A(Agent-to-Agent)Gateway 中註冊 LangGraph 代理程式,探索其上游 agent card,策展技能與能力,並透過 LiteLLM proxy 呼叫它們。
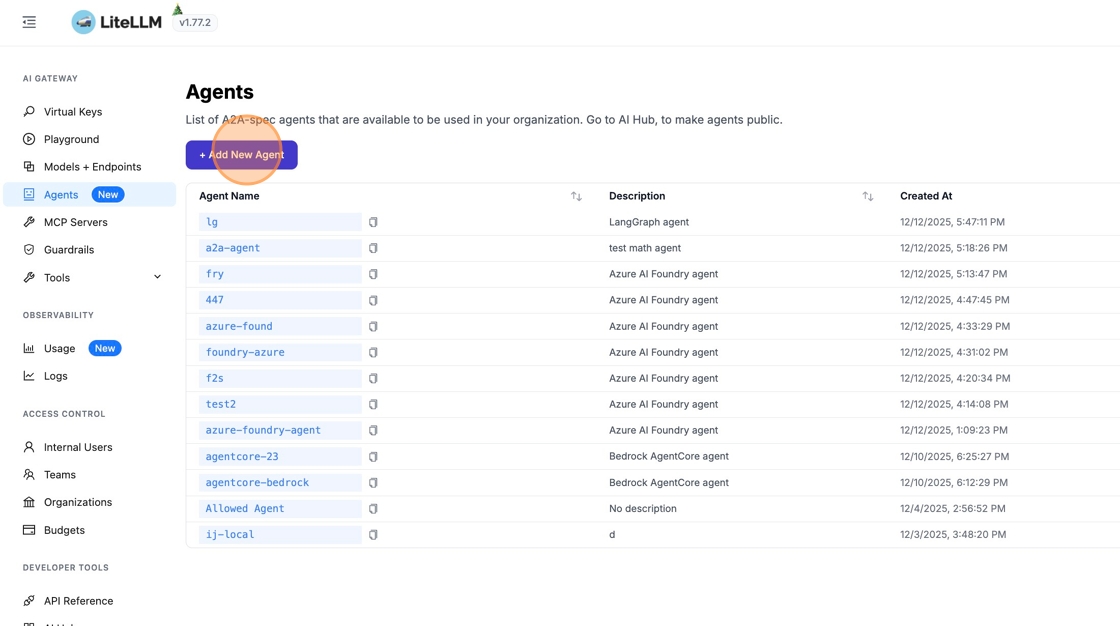
1. 前往 Agents
從側邊欄點擊「Agents」以開啟代理程式管理頁面,然後點擊「+ Add New Agent」。
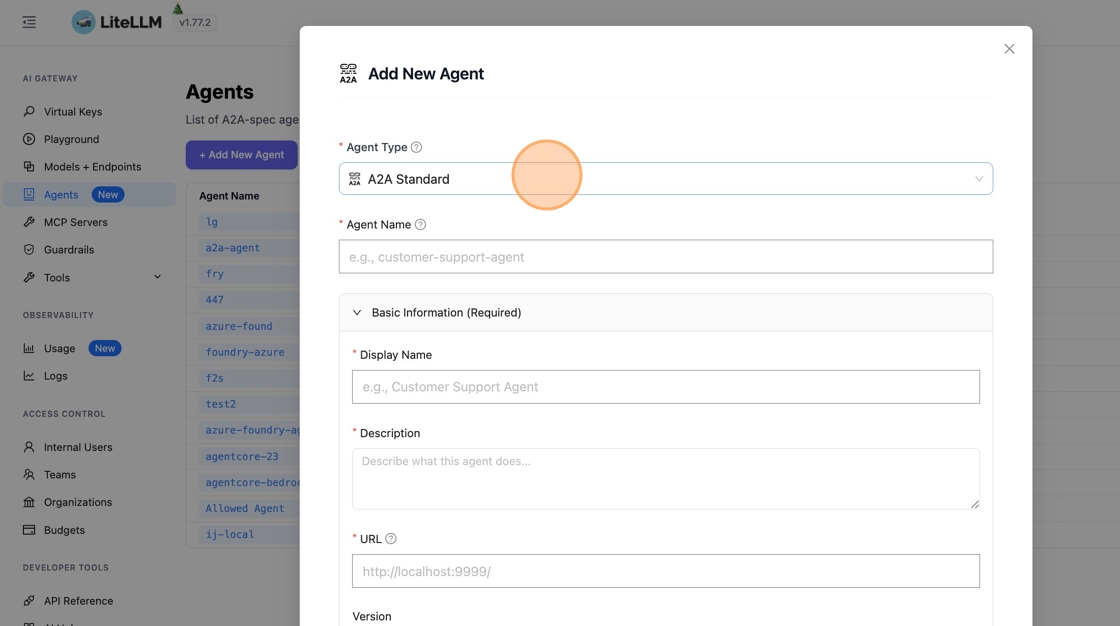
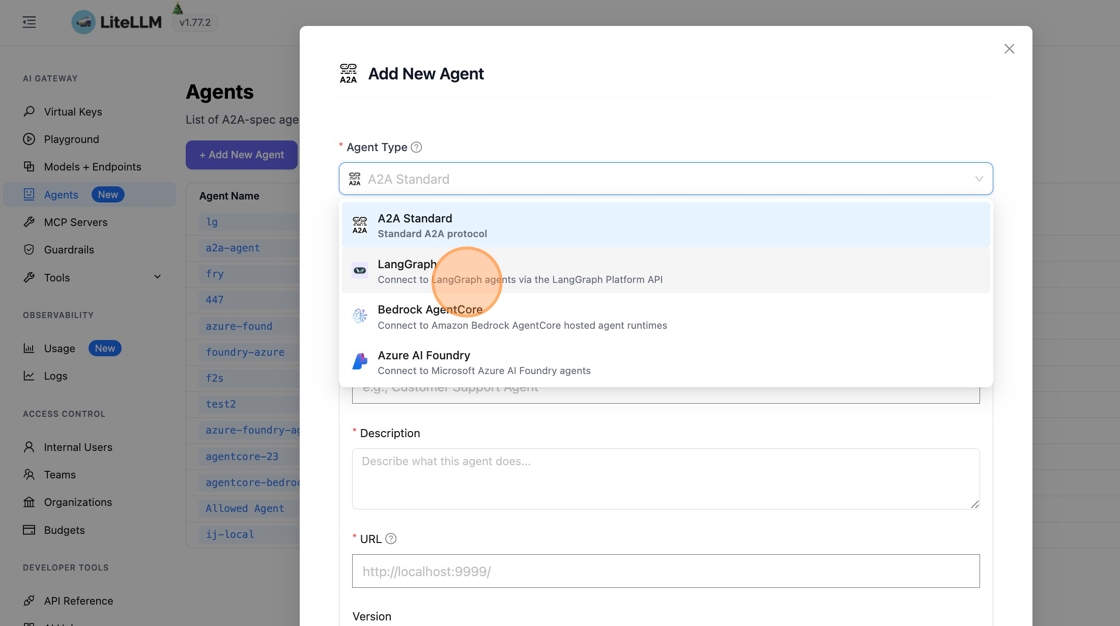
2. 選擇 LangGraph Agent 類型
點擊「A2A Standard」以查看可用的代理程式類型,然後搜尋「langgraph」並選取「Connect to LangGraph agents via the LangGraph Platform API」。
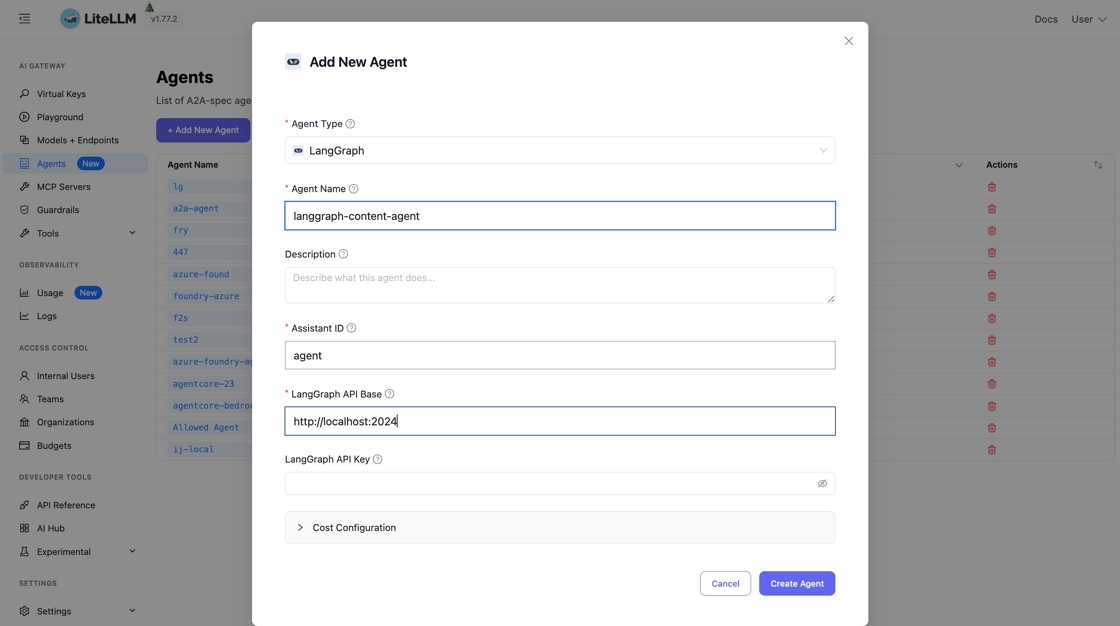
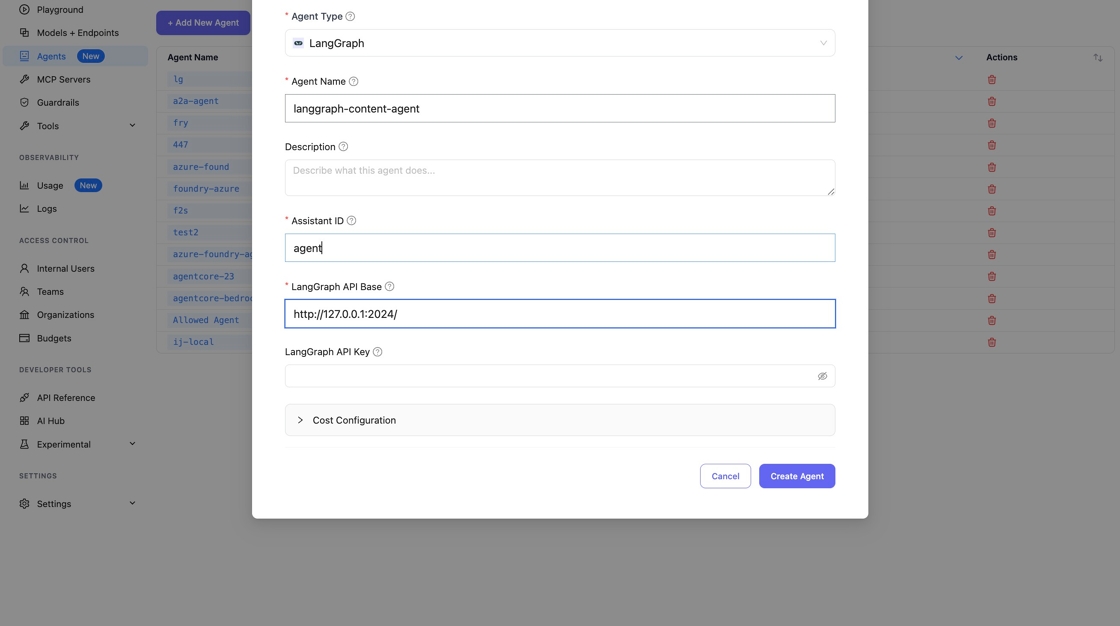
3. 設定代理程式
填入以下欄位:
- Agent Name - 唯一識別碼(例如,
lan-agent) - LangGraph API Base - 您的 LangGraph 伺服器 URL,通常為
http://127.0.0.1:2024/ - API Key - 可選。LangGraph 預設不需要 API 金鑰
- Assistant ID - LangGraph 不會使用,您可以在此輸入任何字串
4:探索 agent card
一旦填入 base URL 和 assistant ID,探索就會自動執行。您也可以從探索面板手動觸發。
預覽是一個表單。您可以:
- 編輯 名稱、說明、provider、icon URL,以及文件 URL。
- 新增、移除或重新排序技能,並編輯每個技能的名稱、說明、標籤、範例,以及輸入/輸出模式。
- 切換 LiteLLM 支援的能力。
在儲存前選取或取消選取技能與能力。LiteLLM 只會保留您在表單中保留的內容。
LiteLLM 不會代理的欄位不會顯示。如需完整支援矩陣,請參閱 Agent card support。
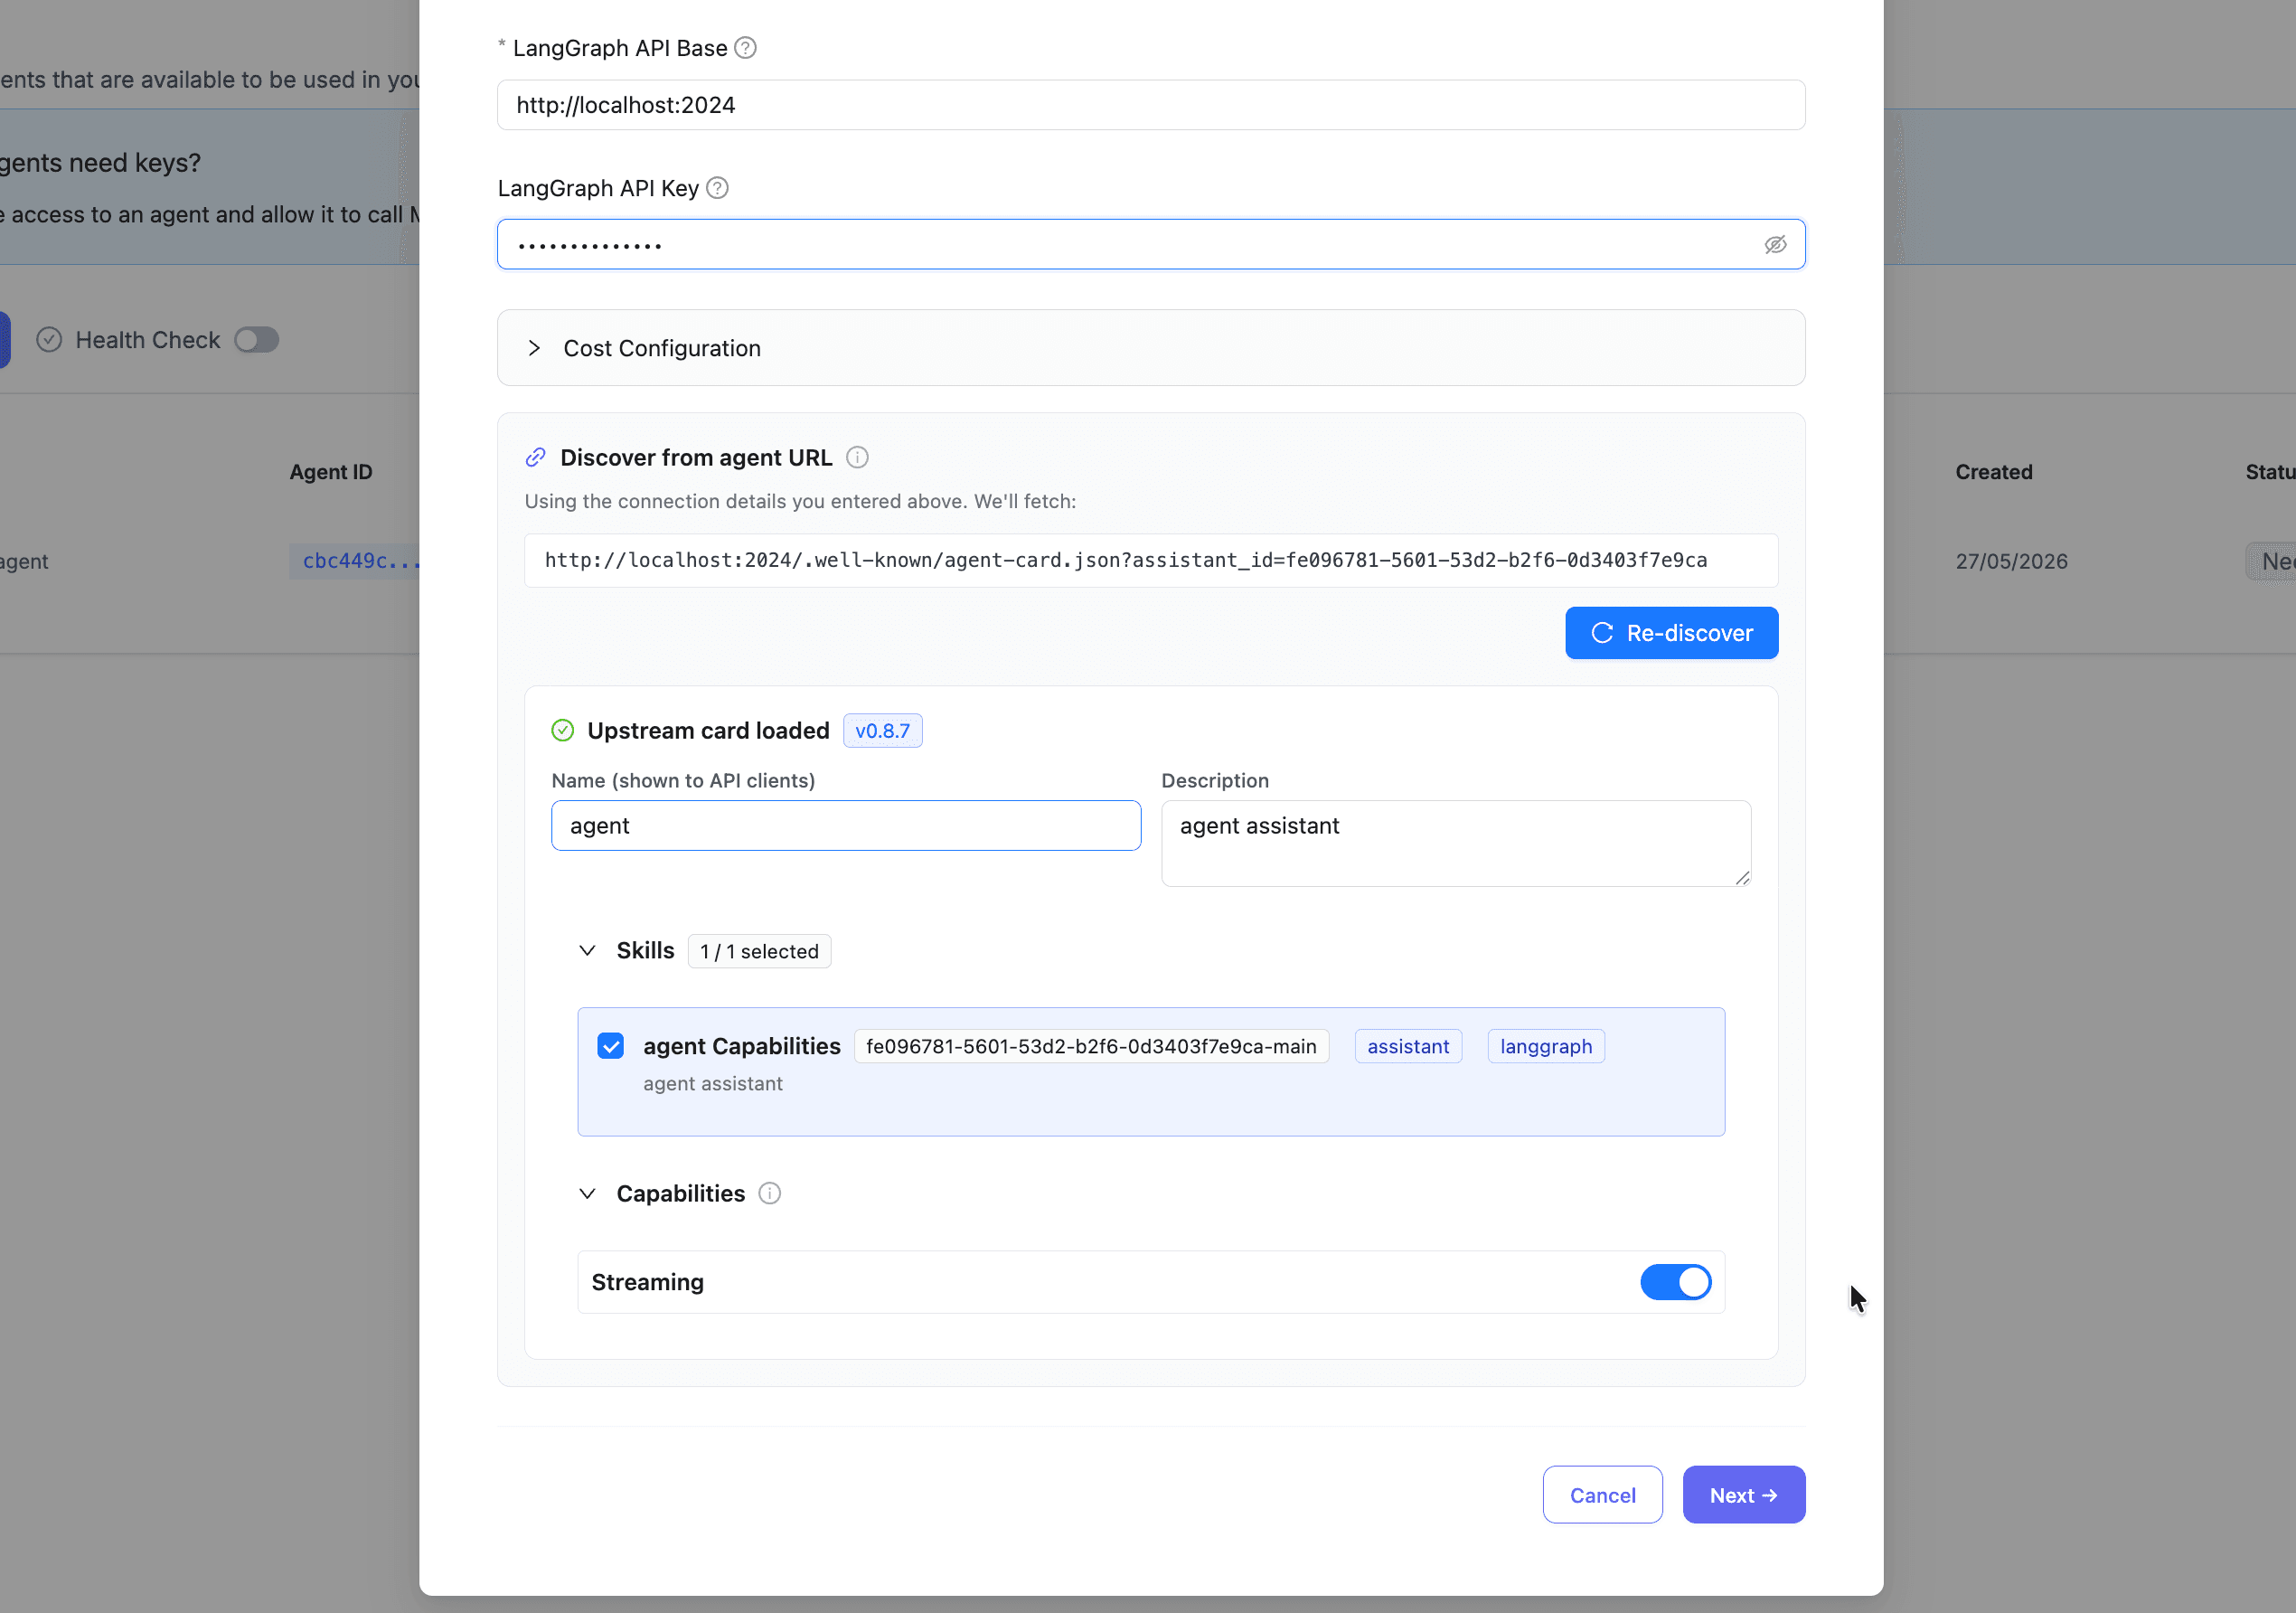
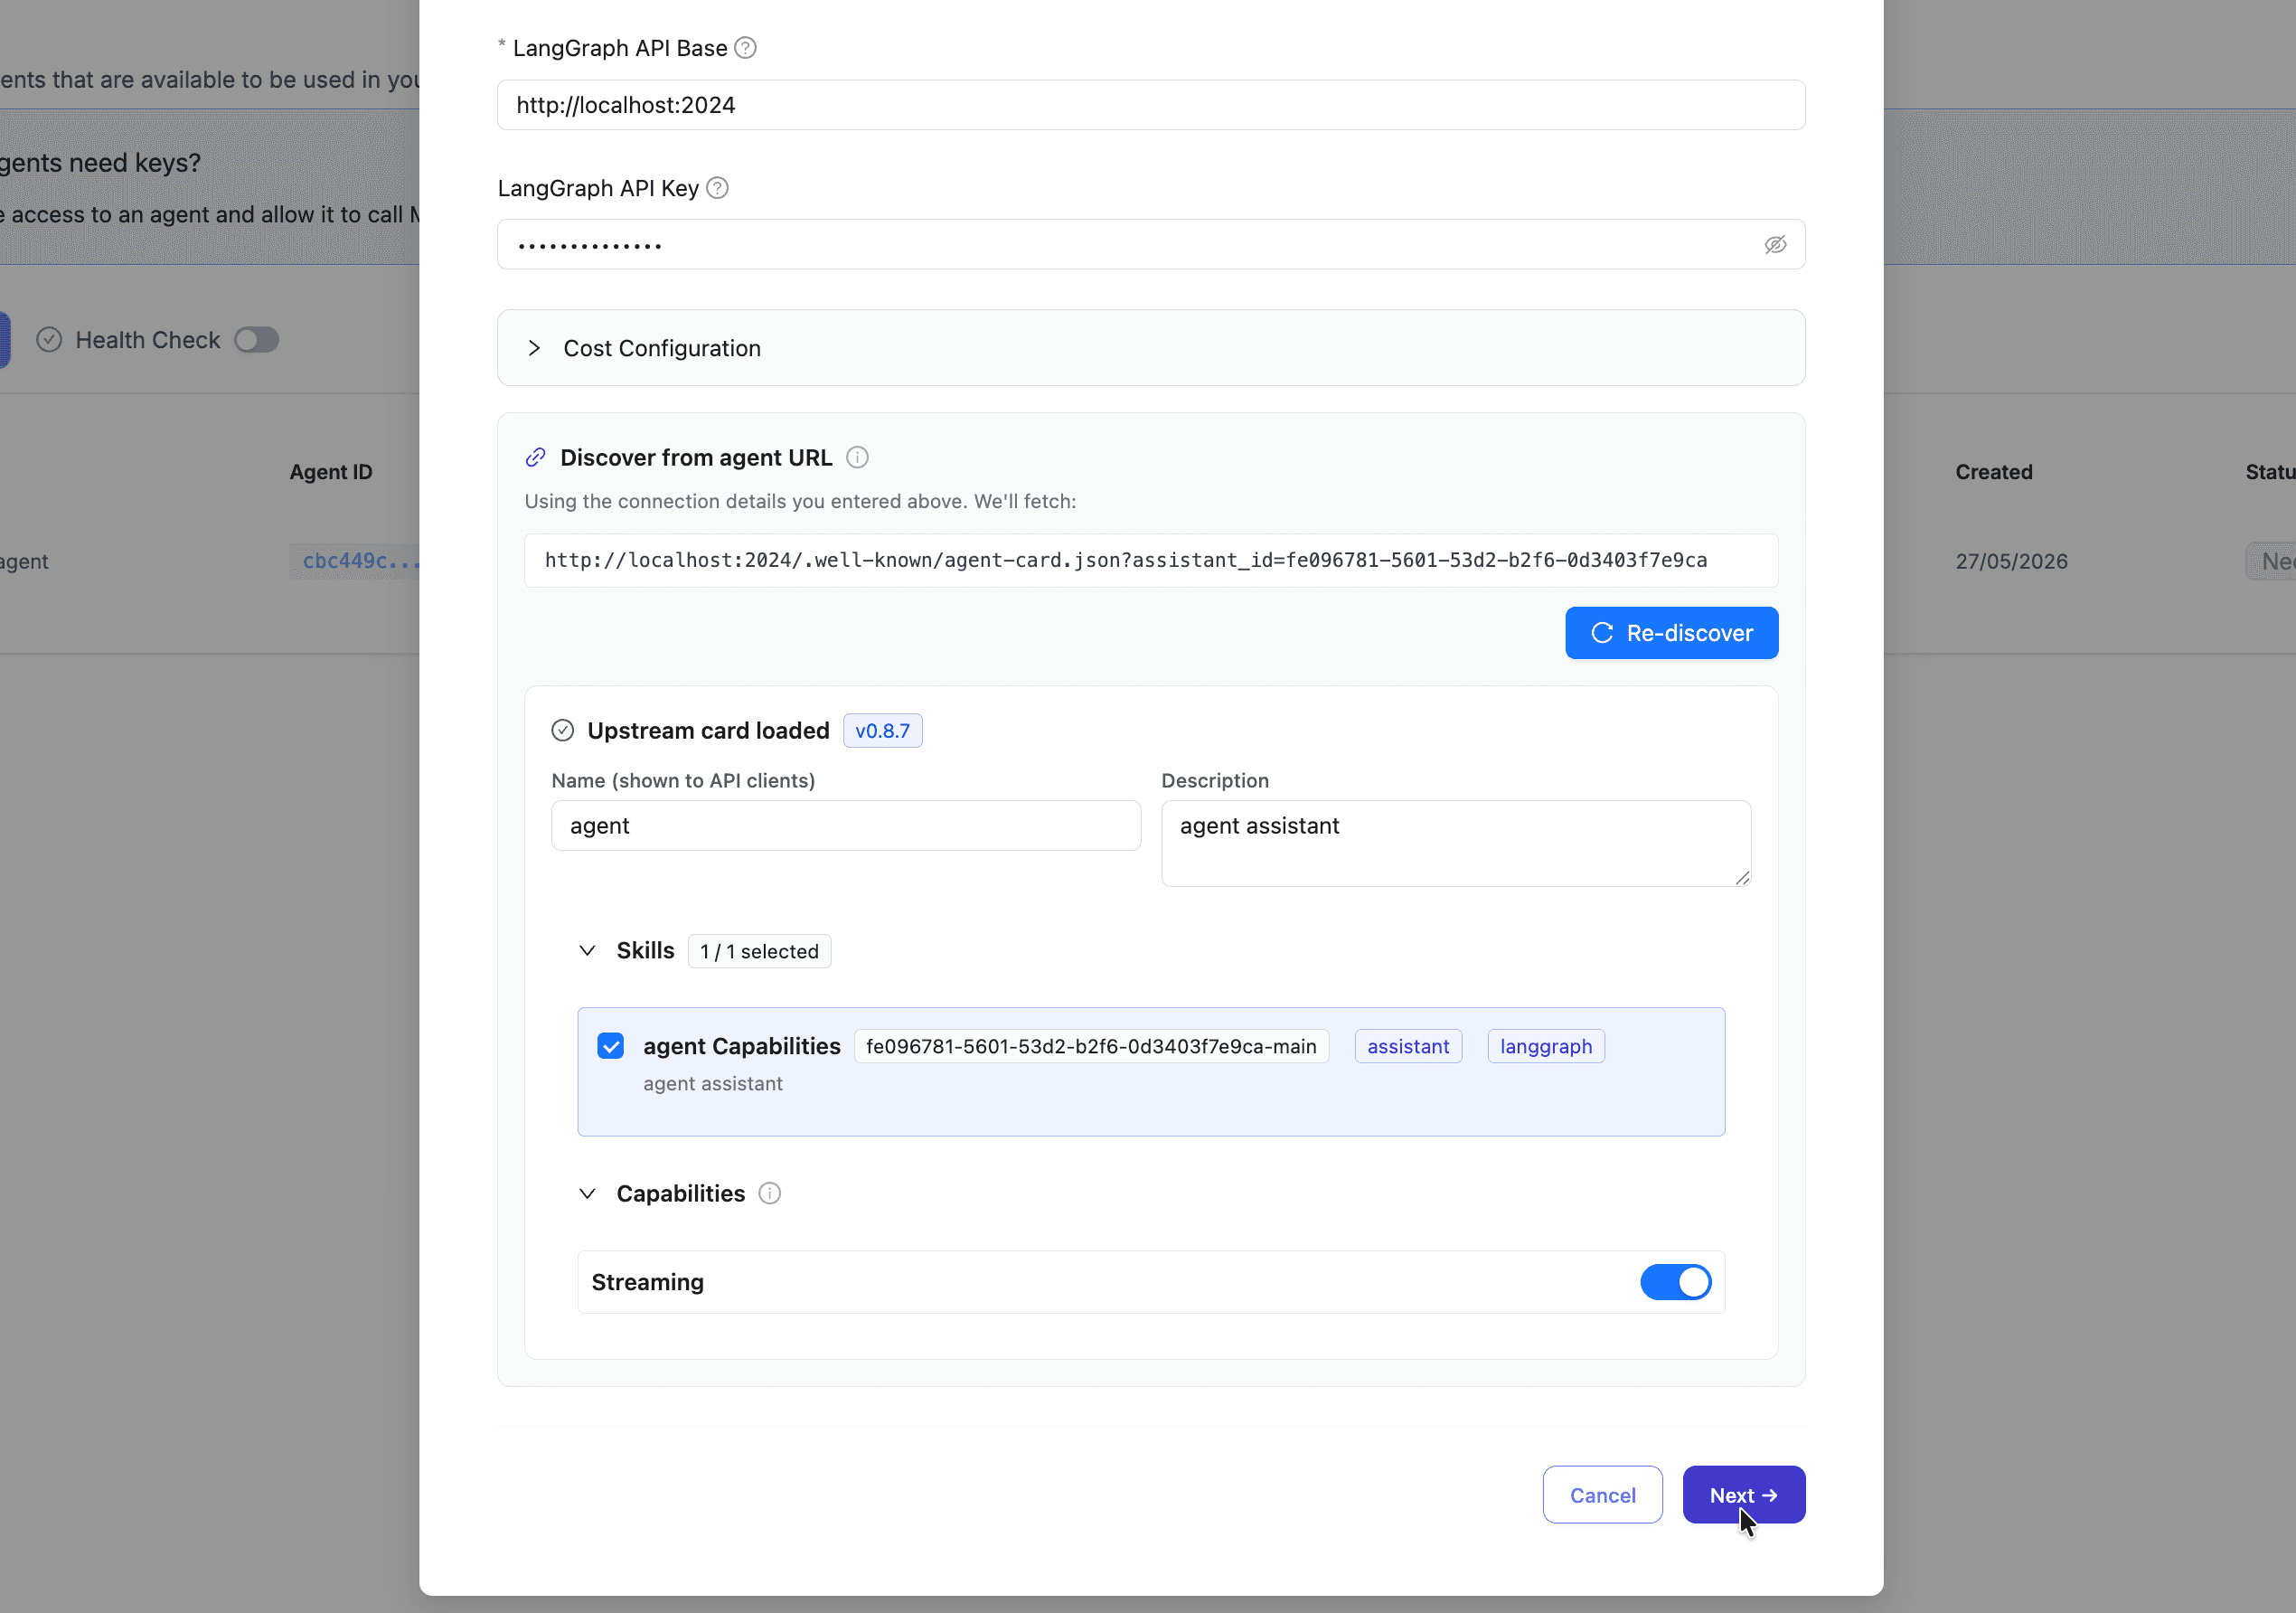
5:儲存代理程式
點擊 Next 以儲存,並完成其餘步驟
6:驗證已提供的 card
從您的終端機擷取 LiteLLM 正在提供的 agent card:
curl -H "Authorization: Bearer sk-1234" \
  http://localhost:4000/a2a/{agent_id}/.well-known/agent.json | jq
您應該會看到您儲存的 card,其中:
- 指向 LiteLLM 而非上游的
supportedInterfaces[0].url - 顯示
securitySchemes為LiteLLMKey(HTTP bearer) - 您在註冊期間保留的技能
7. 在 Playground 中測試
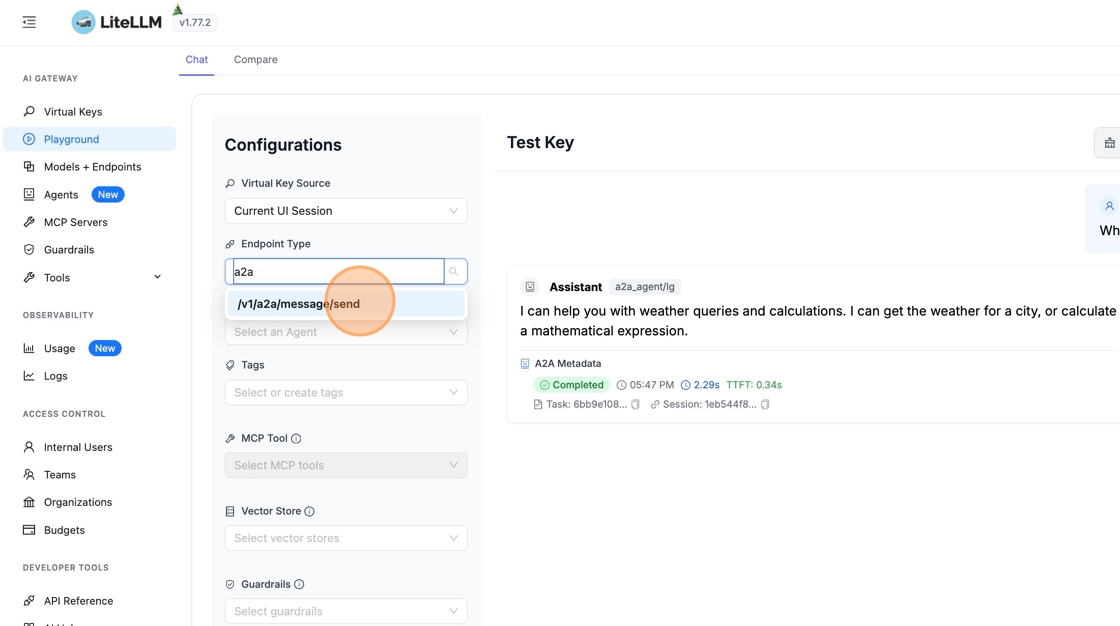
前往側邊欄的「Playground」來測試您的代理程式。將端點類型改為 /v1/a2a/message/send。
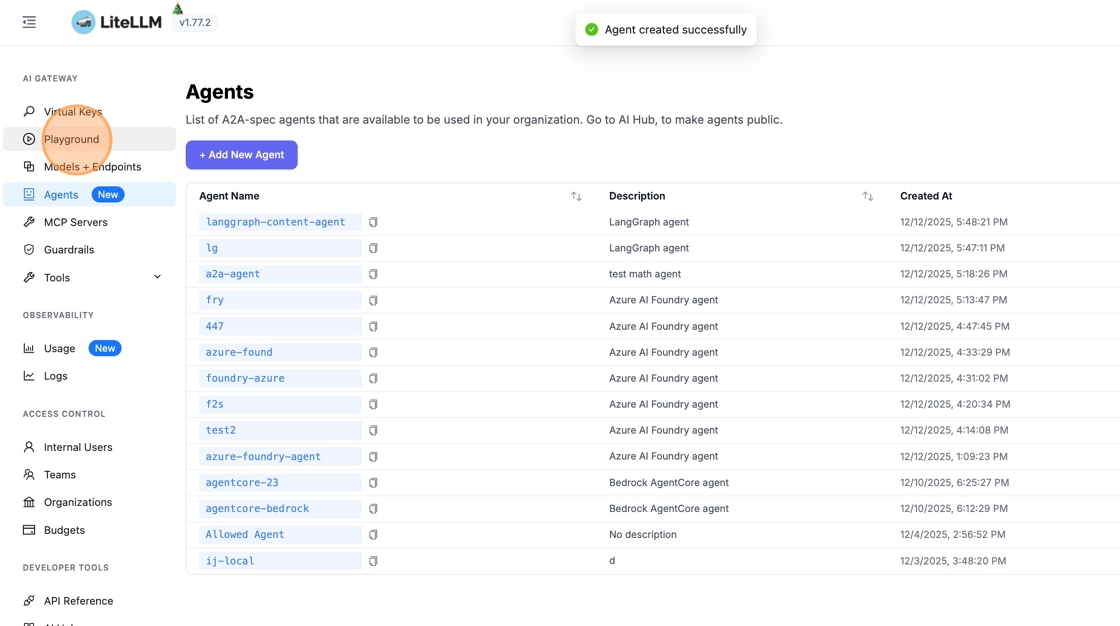
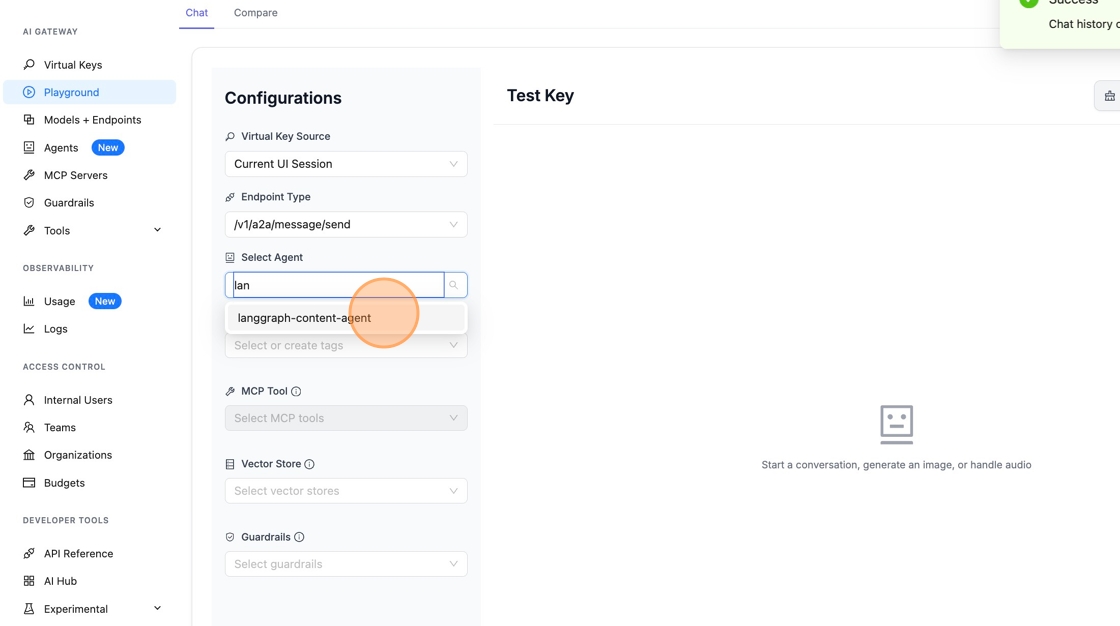
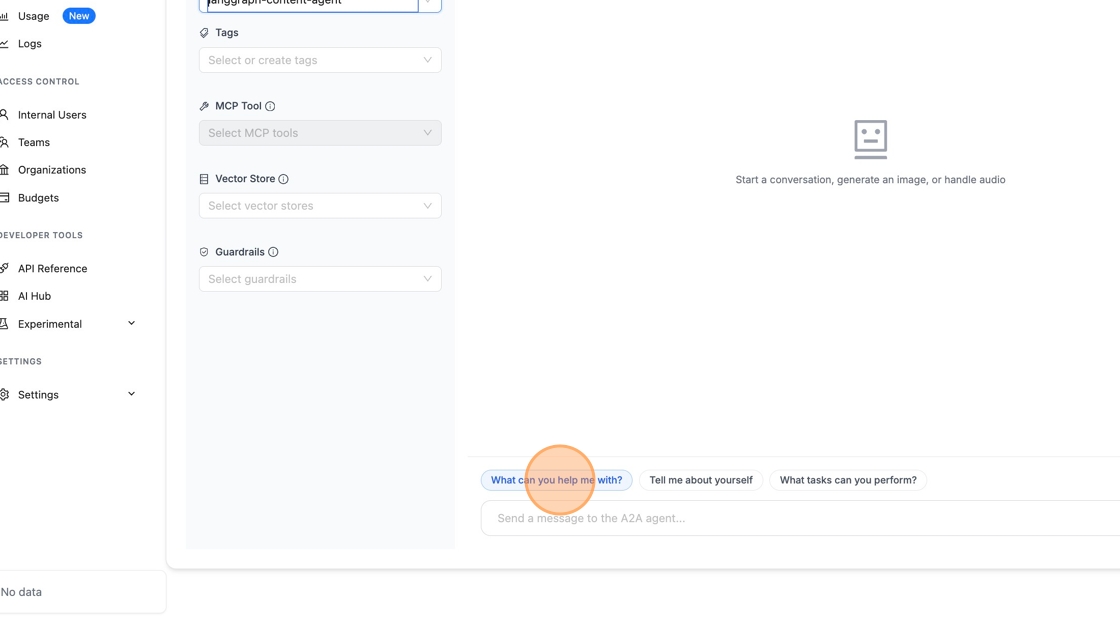
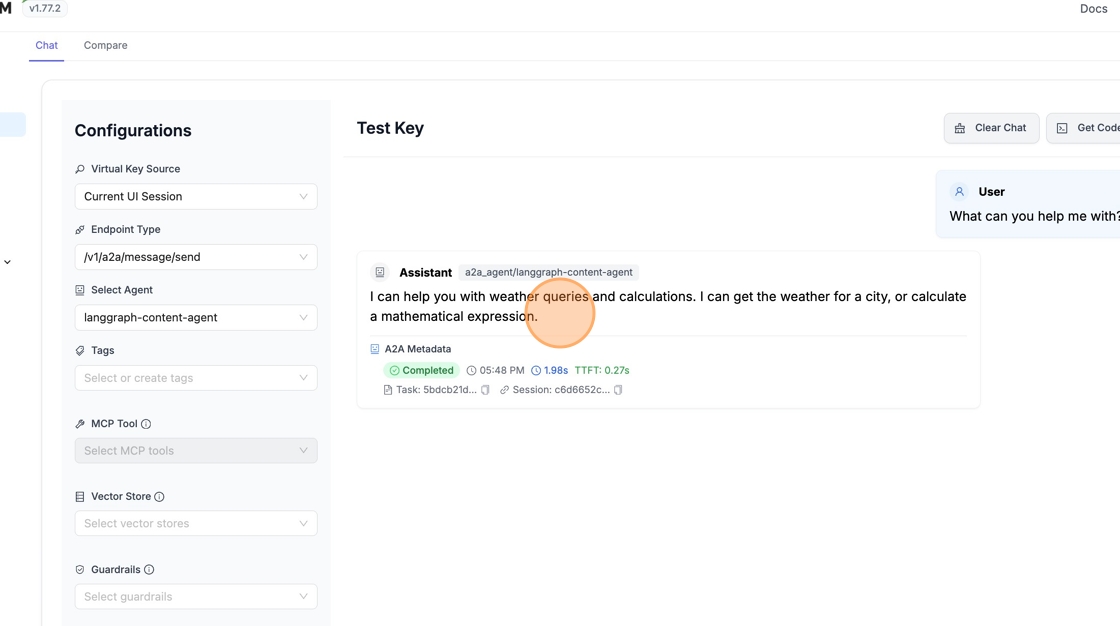
8. 選擇您的代理程式並傳送訊息
從下拉選單選取您的 LangGraph 代理程式並傳送測試訊息。
9:手動呼叫代理程式
向 LiteLLM proxy URL 傳送一個 A2A message/send 請求:
curl -X POST http://localhost:4000/a2a/{agent_id} \
  -H "Authorization: Bearer sk-1234" \
  -H "Content-Type: application/json" \
  -H "Accept: application/json" \
  -d '{
    "jsonrpc": "2.0",
    "id": "req-1",
    "method": "message/send",
    "params": {
      "message": {
        "messageId": "msg-001",
        "role": "user",
        "parts": [{"kind": "text", "text": "My order is urgent and still not delivered"}],
        "metadata": {"skillId": "triage_ticket"}
      }
    }
  }'
若要串流,請使用 message/stream 並在 curl 中加入 -N -H "Accept: text/event-stream"。
另請參閱 Invoking A2A Agents 以取得 SDK 範例。