✨ [Beta] Project Management UI
This is an Enterprise feature. Enterprise Pricing
Manage projects directly from the LiteLLM Admin UI. Projects sit between teams and keys in your organizational hierarchy, enabling fine-grained access control and budget management for specific use cases or applications.
Project Management is a beta feature. The API and UI are subject to change. For the full API documentation, see Project Management.
Overview
Projects enable you to:
- Organize API keys by use case or application
- Set project-level budgets and rate limits
- Track spend and usage at the project level
- Control which models each project can access
- Maintain clear separation between different applications or teams
Hierarchy: Organizations > Teams > Projects > Keys
For detailed information about the project API and configuration, see Project Management.
Prerequisites
- Admin or Team Admin access
- At least one team created (projects belong to teams)
- The LiteLLM Admin UI running locally or remote
Enable Projects in UI Settings
Before you can create projects, you need to enable the Projects feature in the Admin UI settings.
Step 1: Access Admin Settings
Navigate to the Admin UI (e.g., http://localhost:4000/ui/?login=success).
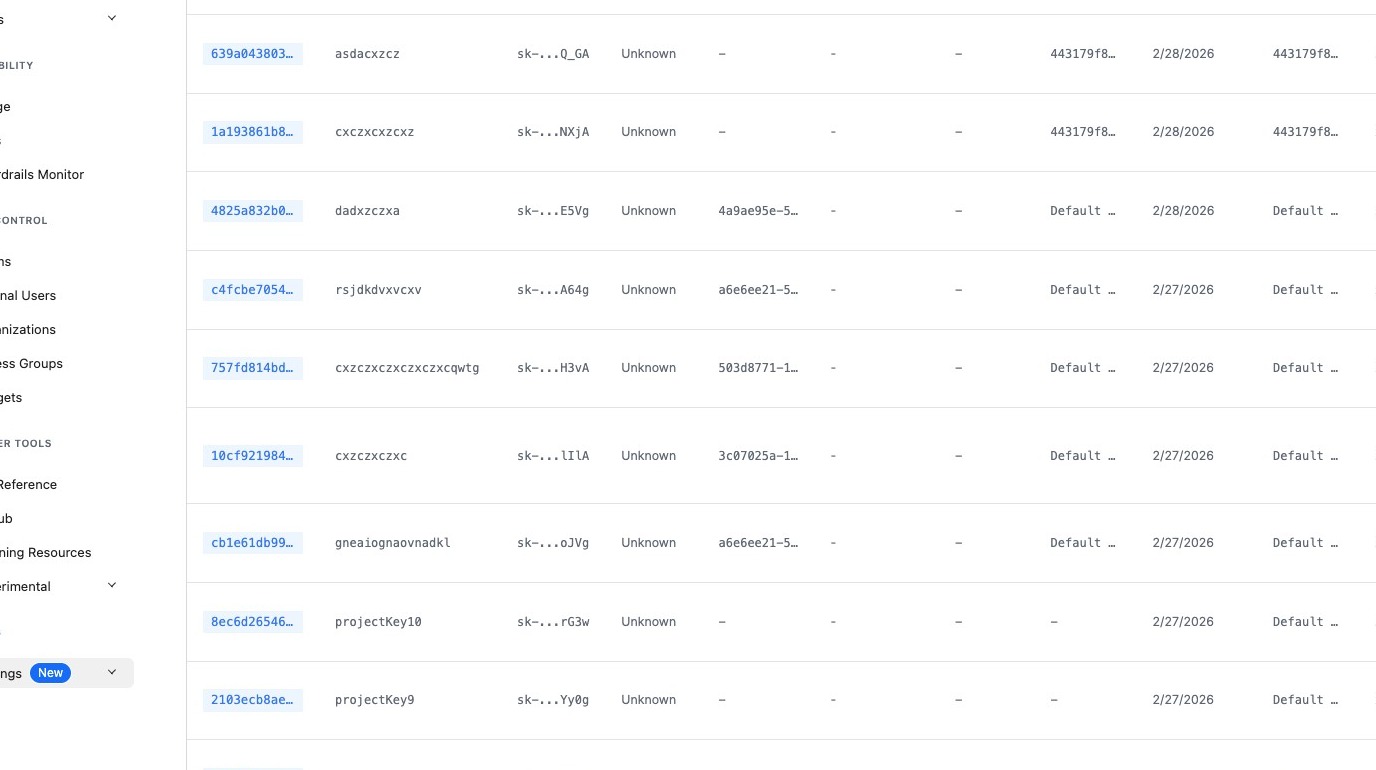
Step 2: Open Settings Menu
Click the "New" button in the top navigation.
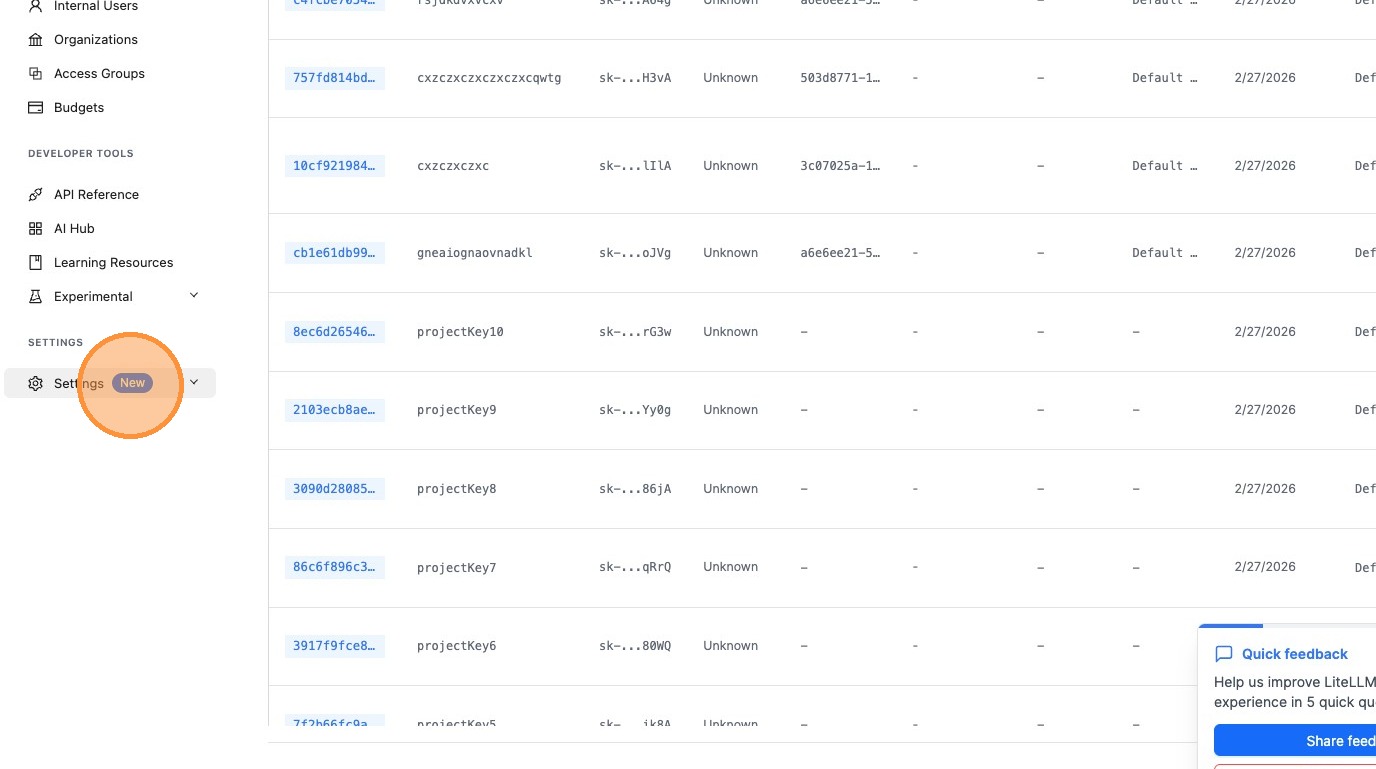
Step 3: Navigate to Admin Settings
Click "Admin Settings".
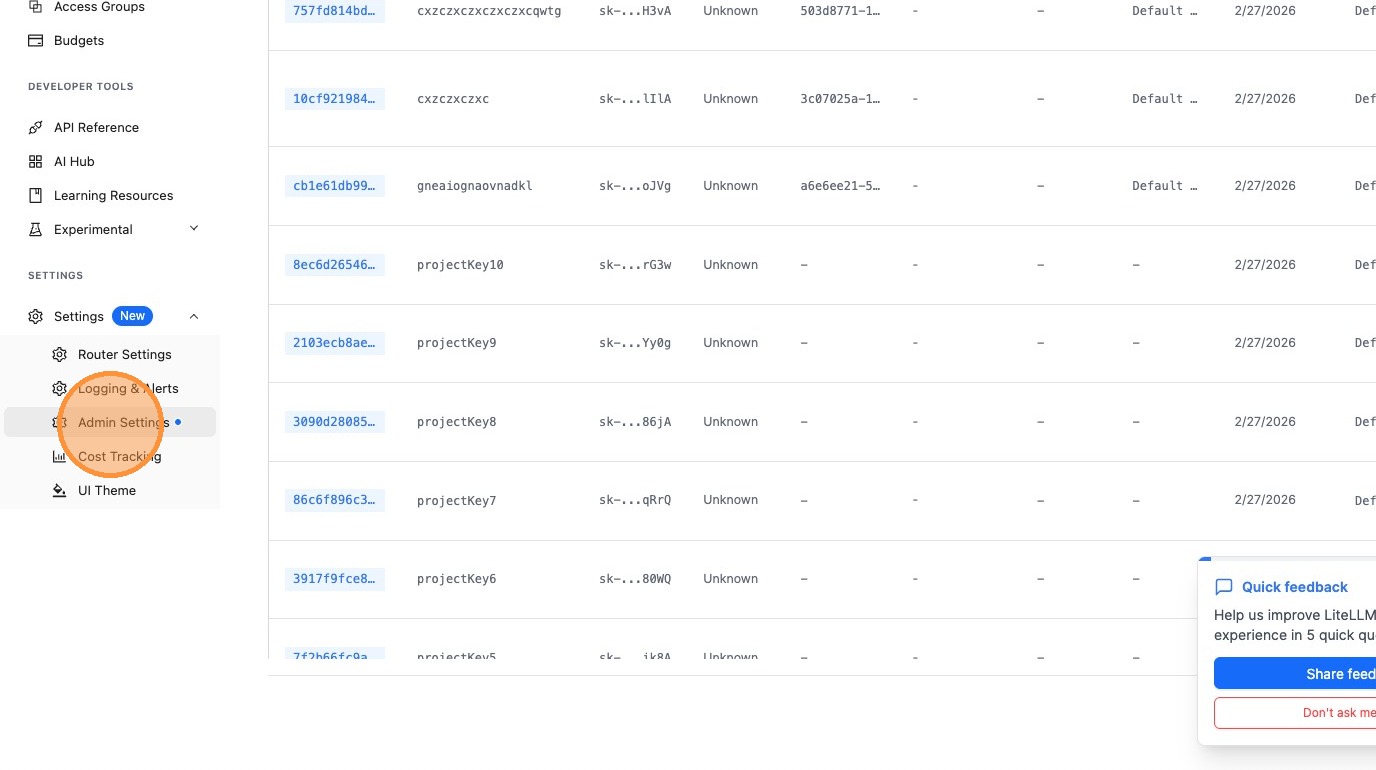
Step 4: Open UI Settings
Click "UI Settings New".
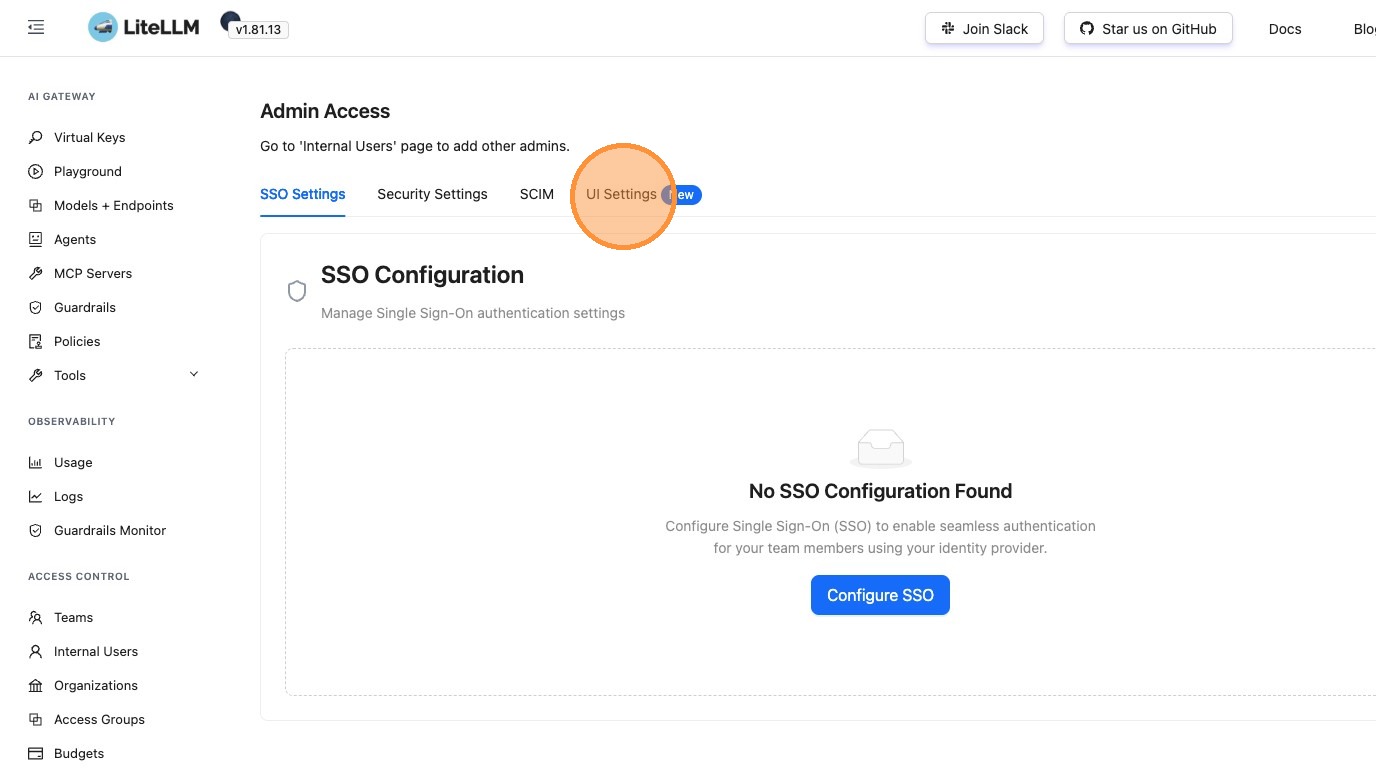
Step 5: Enable Projects Feature
Click the toggle to enable the Projects feature.
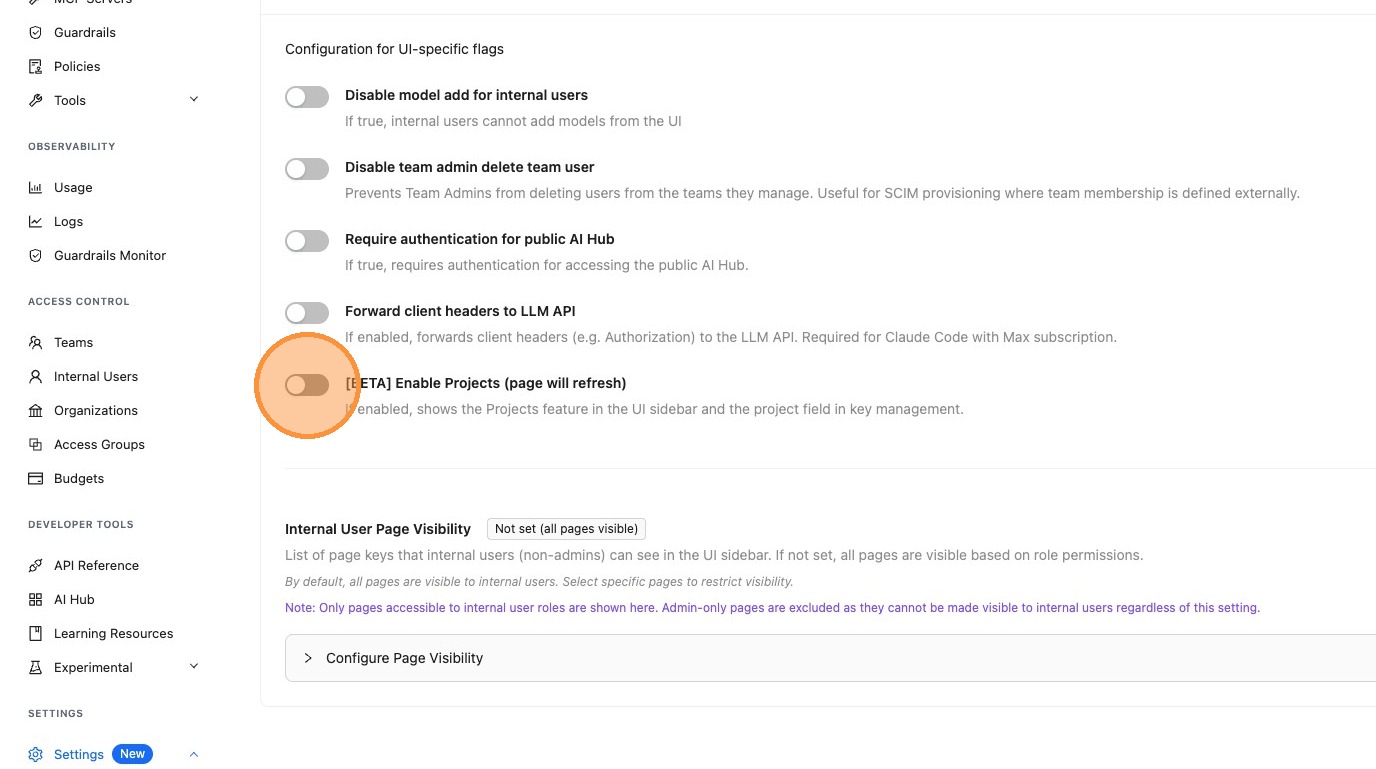
Once enabled, the Projects section will appear in your Admin UI navigation, and you'll be able to create and manage projects.
Create and Manage Projects
After enabling the Projects feature, you can create projects from the Projects page.
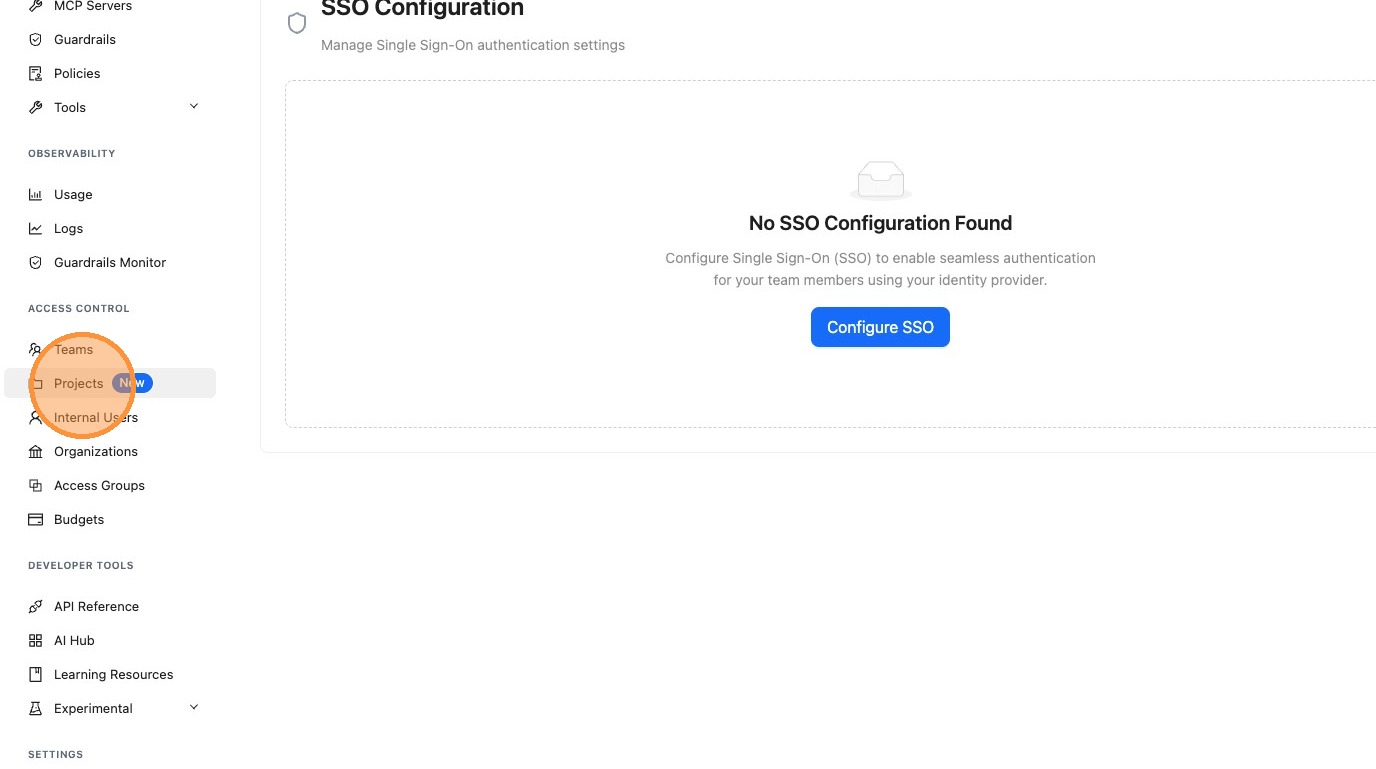
Step 1: Navigate to Projects
Click "Projects New" in the sidebar.
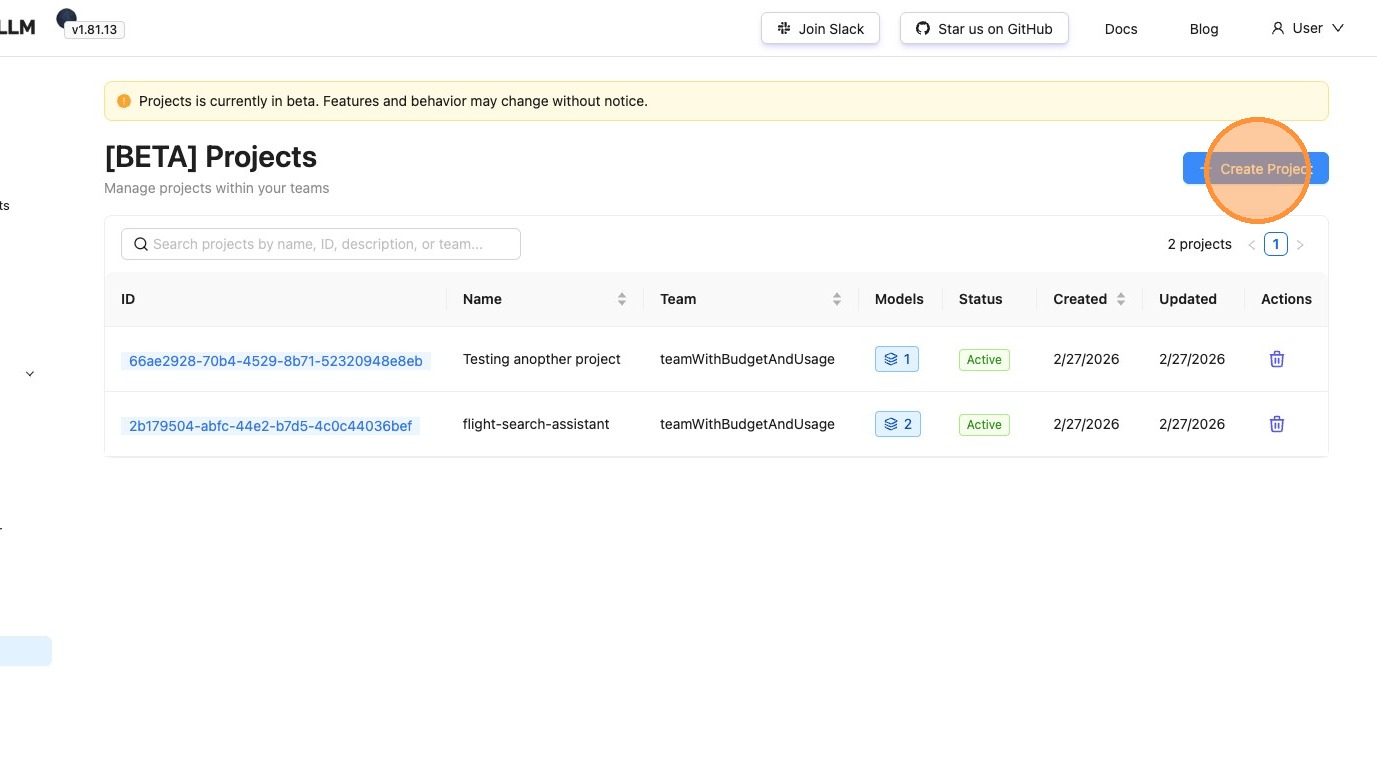
Step 2: Create a New Project
Click "Create Project".
Step 3: Enter Project Name
Click the "Project Name" field and enter a name for your project.
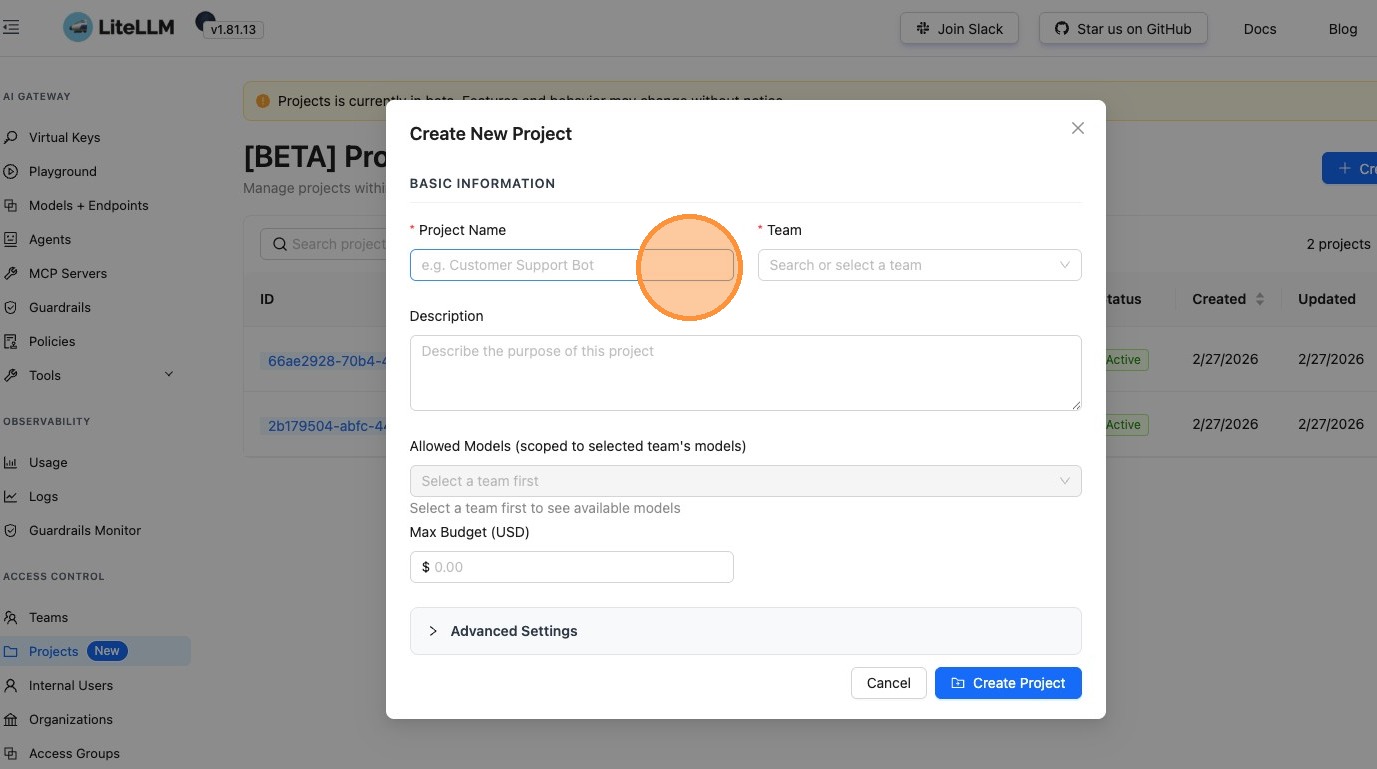
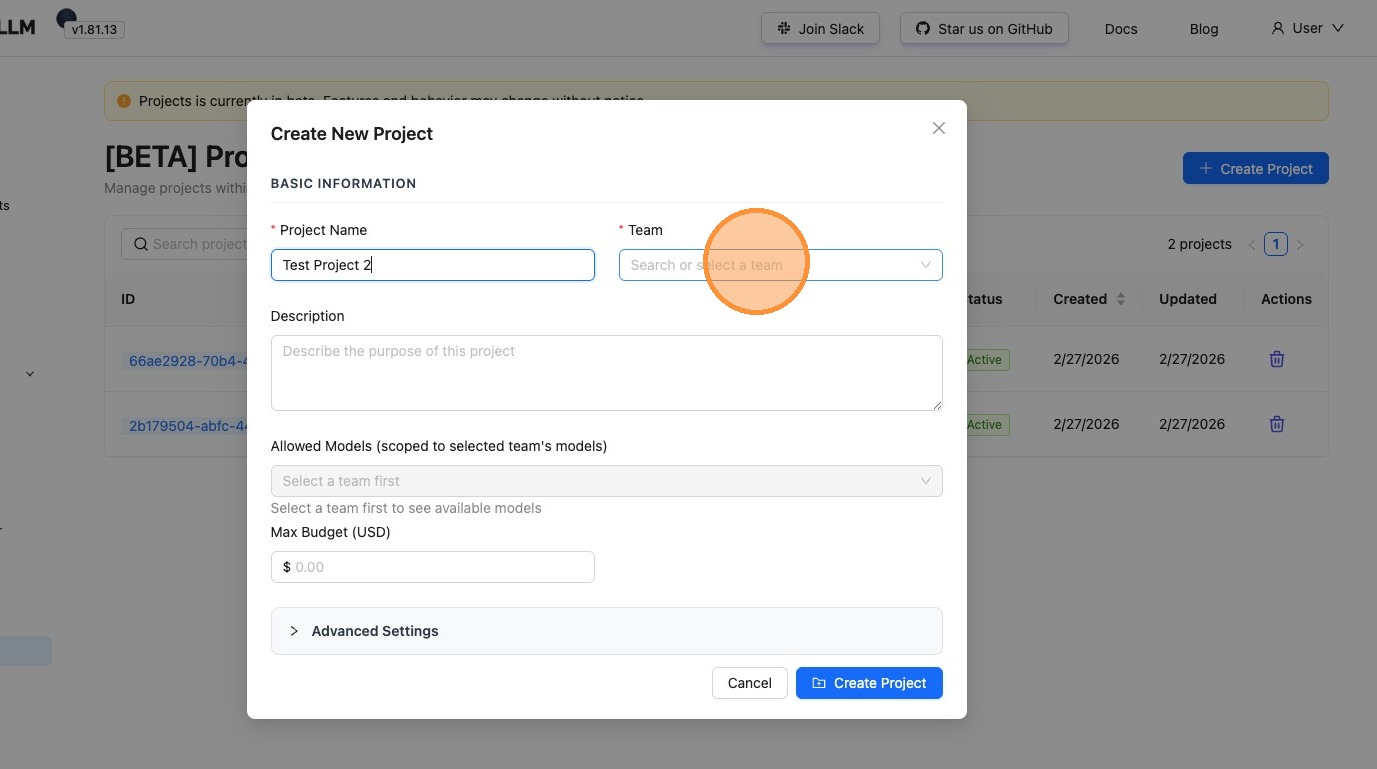
Step 4: Select a Team
Choose which team this project belongs to. Projects are scoped to teams, so you can only access models and features available to that team.
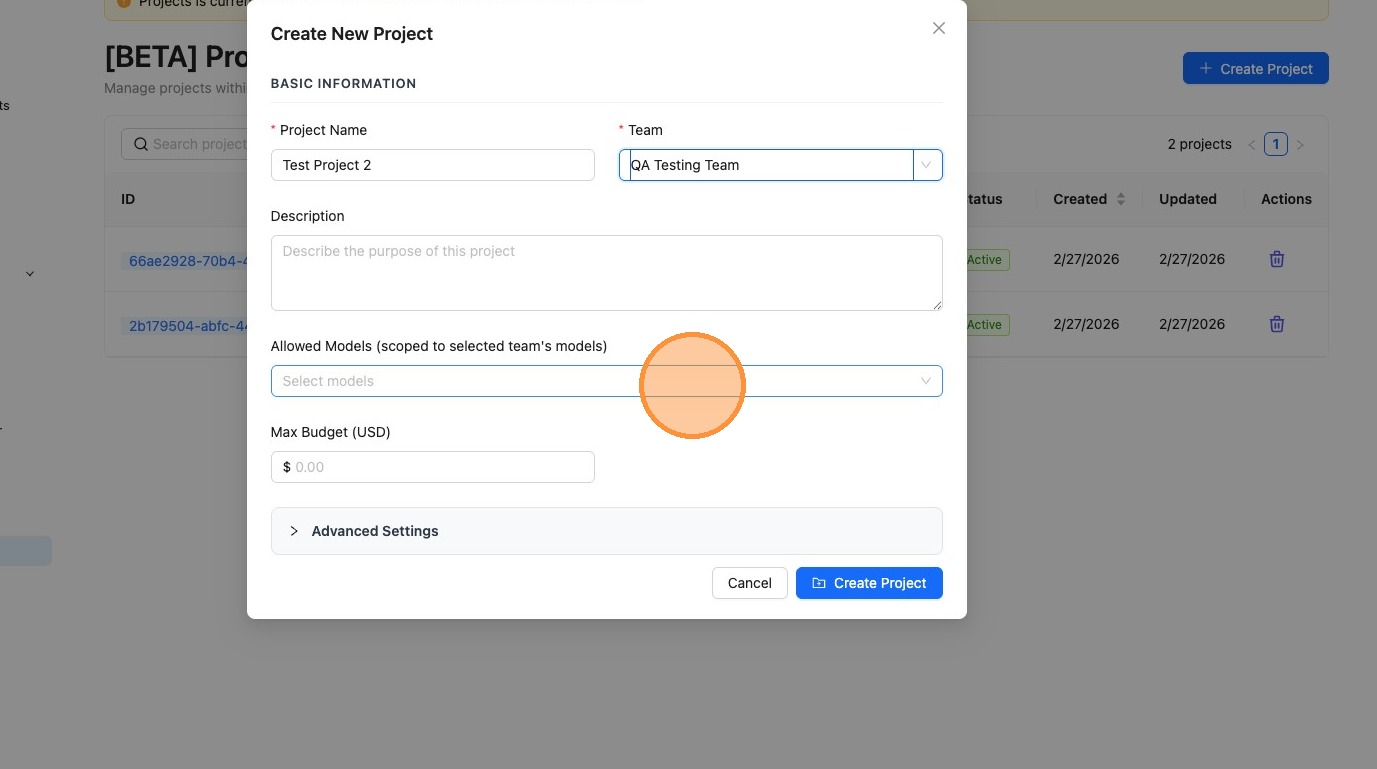
Step 5: Configure Model Access
Select which models this project has access to. Available models are scoped to the team's allowed models.
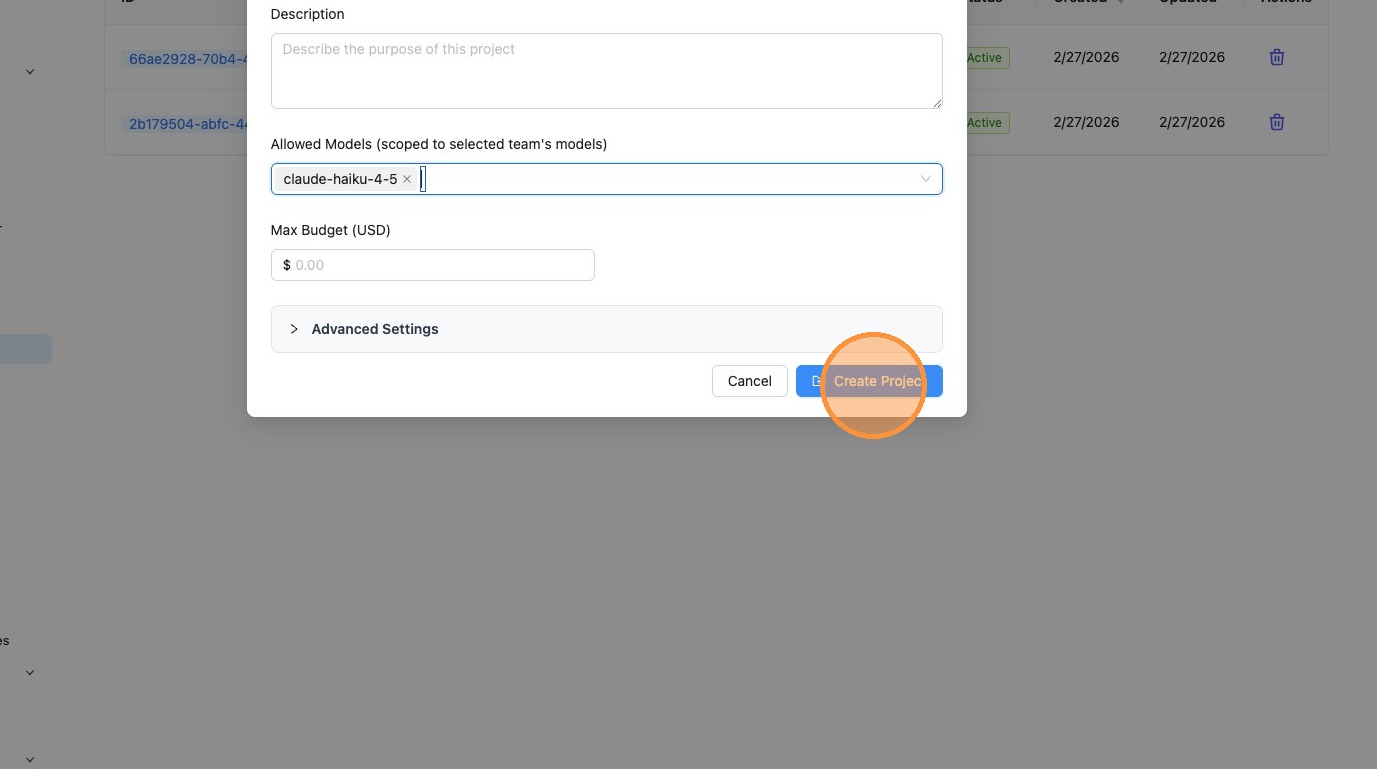
Step 6: Create Project
Click "Create Project" to save your project.
Use Cases
Key Organization Within Teams
Organize API keys within a team by use case or application. Group related keys together in projects so you can manage budgets, model access, and permissions as a unit instead of individually.
Cost Allocation
Assign projects to different cost centers or teams. Track spend per project and allocate costs back to the responsible team or business unit.
Feature Rollout
Create a dedicated project for new features or experimental use cases. Control which models are available and set conservative rate limits during testing.
Customer Segmentation
If you're a platform, create projects for different customer segments or use cases. Control resource allocation independently for each segment.
Next Steps
After creating a project:
- Generate API Keys – Create API keys scoped to your project for application use
- Set Budgets – Configure project-level budget limits via the Project Management API
- Track Spend – View project-level spend in the Usage dashboard
- Manage Access – Use Access Groups to control model and MCP server access
Related Documentation
- Project Management API – Full API reference for projects
- Access Groups – Define reusable access controls for models, MCP servers, and agents
- Virtual Keys – Create and manage API keys scoped to projects
- Role-based Access Control – Organizations, teams, and user roles
- Spend Logs – Track detailed request-level costs and usage